Camera Shots Info PT.2 (Trial)
Okay so I was more excited for these shots than the angles. Mainly because there were more types to do. This was more interactive because I got my muse to do poses to make sense of the type of shot. He did end up taking his outfit off after, by my mistake, telling him I was done. But I forgot that I needed more types so he has on a undershirt in two of the photos and the other picture is of me because I didn't want to go high on the ladder so he captured the photo for me. I used my personal phone to take this picture. I have an IPhone XR and the camera is pretty decent, however, it could be better. Hopefully I get a new phone so I'm able to take better quality photos.

Long shot:
I took this photo with the tree sort of blocking the view to show that I'm capturing him being sneaky in the environment he's in. I'm far away because that's what a long shot is. Taking the photo from this distance shows how he's interacting with the environment and shows the actions of his full body and what he's up to next.

Mid Shot:
I took this photo from the waist up to represent a mid-shot. This emphasizes him as well as the big tree behind him. In this photo, he's looks to the side of him to pretend that he's searching for something but its behind him. Similar to what Dora does when she asks "did you see the _____?"

Wide Shot:
I took this landscape position. I'm showing my muse in their environment, the time its taking place, as well as where its taking place.


Master Shot:
To show the setting of where I was taking my photos, I took the shot like this. The difference between this and the establishing shot is that the master shot includes the subject while the establishing does only the setting. So you can tell the difference when a movie is starting and they show where the story will be taking place then soon after, the master shot will appear with the characters.
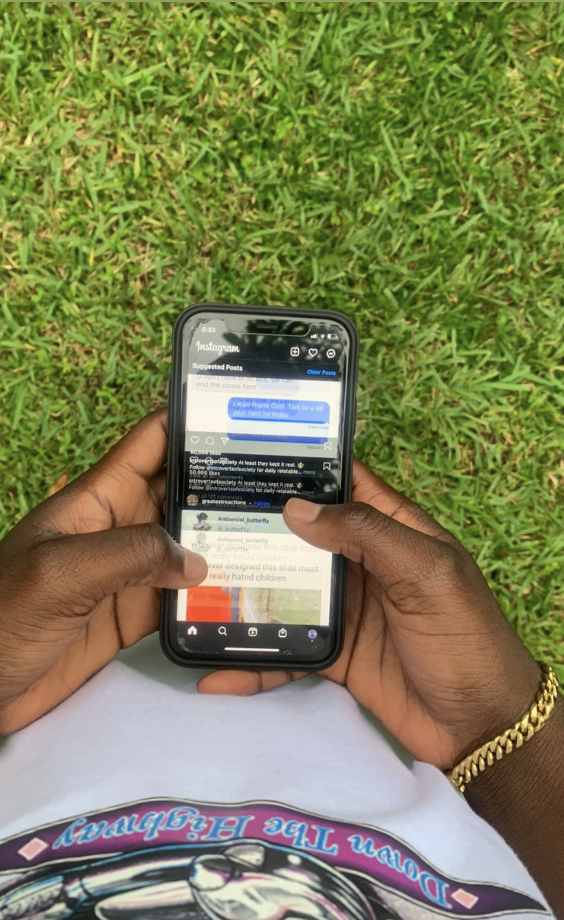
Point of View Shot:
This shot clearly shows what the subject is looking at, which is his phone. Its giving you a personal view of what's being seen so its as if you're the character themselves which makes it seem so interactive.

Establishing Shot:
I took this in a horizontal view to capture where I was taking my photo. This shows the setting of the scene.

Over The Shoulder Shot:
This shot was meant to create tension between what the viewer sees from a point of view that's directly behind them. Its shows what's in front of them so we can see what they see, but we don't see how they're reacting so it creates the tension like I mentioned before.

Aerial Shot:
This shot is from birds eye view. However, I do wish that it was further in the air but it rained earlier. I didn't want my brother on a wet roof incase he could've slipped. I'm not doing any pose but it's meant to show the viewer a deeper understanding of what's happening on the ground.

Close-Up Shot:
I took this photo to emphasize the rage in my muses' face. (I'm aware you can't see it because it is blocked, but you have an imagination... so please imagine because I'm respecting his terms)

Two Shot:
This two shot is of me and my muse. You can tell its a two shot because it includes two subjects. It shows our emotions (you can't see his because his face is blocked but he was also smiling) interact between us.
After taking these photos, I confused long shot and mid shot. I'm not exactly clear on what they are because when I searched them up, the web used them interchangeably. The rest of the types were easy to spot/make. I do regret taking photos of a person instead of a toy because it would've been easier but it didn't cross my mind. But regardless, this was a fun exercise, I'll see you next time! Bye!
.png)
.png)
Comments
Post a Comment